Using Basic and Tween Transitions in d3.js
Playing around at CodePen is one of my favourite activities, when doing ‘nothing’ lately. Especially the combination of dribbble and CodePen is super nice. Browsing for beautiful designs and ideas on dribbble and putting them into code became a nice activity for me. There are a lot of great people hanging around at dribbble and you can get a lot of inspiration over there.
Over the last few month I started being interested in dashboards and how to analyze/visualize data. Unfortunately I am not a designer and this is why I really enjoy to just build dashboards according to a dribbble design.
Dashboard examples
Two example of these tryouts are the following. They include some basic d3.js charting and make usage of a few different kinds of animation to make them look pretty and have some fun on my side.
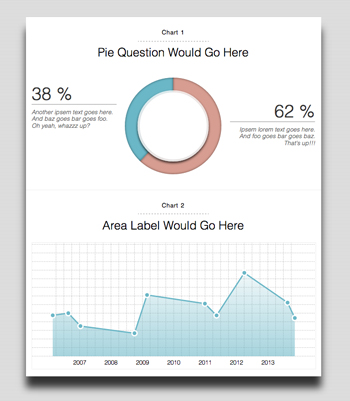
Example 1 – referenced as “bright dashboard” later on

You can check the coded result here and the used design here.
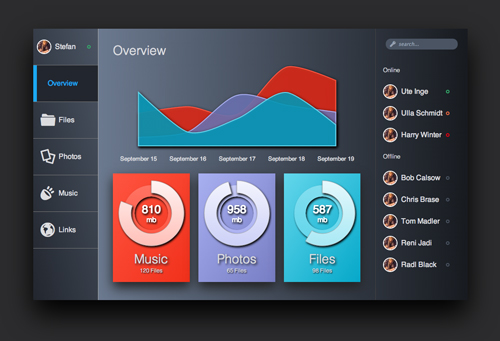
Example 2 – referenced as “dark dashboard” later on

You can check the coded result here and the used design here.
Last week I got a Tweet by @jessicard asking, if I may want to explain how the tween function in d3.js works, because it is used several times.
And here we are – let us dive into basic and tween transitions in d3. I’m really sorry for the delay by the way…
Basic animations in d3.js
To achieve basic transition there is no big effort in d3.
1 2 3 4 5 6 7 8 9 10 11 12 13 14 15 16 17 18 19 20 21 22 23 24 25 26 27 28 29 30 31 32 33 34 35 36 37 38 39 40 41 42 43 44 45 | |
There is not much magic going on there. d3 does pretty much all the work for us. For more information you can visit the transition page of the d3 wiki. It is basically just setting an attribute to an element, creating a transition and changing the given attribute later on. It will be transitioned magically.
You can check the result of these lines of code below (you may have to press replay to see the initial animation in action).
That is already pretty nice, but let us dig a bit deeper. ;)
Tween animations in d3.js
There are some cases, where basic transitions will just not work. For example you can have a quick look at the following code, where I tried to animate text elements showing numbers from zero to 10.
It is unfortunately not working with the usage of a basic transition. This is the use case for so called tweens in d3. The general documentation for tweens can be found here.
The important facts about transition.tween( name, factory ) are described as follows:
Registers a custom tween for the specified name. When the transition starts, the specified factory function will be invoked for each selected element in the transition, being passed that element’s data (d) and index (i) as arguments, with the element as the context (this). The factory should return the tween function to be called over the course of the transition. The tween function is then called repeatedly, being passed the current normalized time t in [0, 1]. If the factory returns null, then the tween is not run on the selected element.
So, but what does that mean? Let us modifiy the not working text transition example and have a deeper look at the reworked example.
1 2 3 4 5 6 7 8 9 10 11 12 13 14 15 16 17 18 19 20 21 22 23 24 25 26 27 28 29 | |
The first argument of the tween function represents the name of your new custom tween. The second argument is a function that should behave like a factory and return another function. The goal of this factory function is to create (and return) a function that is able to interpolate data and to calculate values depending on the current normalized time. The current normalize time are floating values from zero to one. Zero represents the starting point and one represents the end point of your tween animation.
This means that this return function must be able to do something depending on the current normalized time(see line 23).
d3 already offers a lot of functions to solve exactly this problem – the so called interpolators. In this example I made usage of interpolatorRound. Let us check what that stands for and see what is actually doing by playing just a bit around in the JavaScript console.
1 2 3 4 5 6 7 8 9 10 11 12 13 14 15 16 17 18 | |
d3 offers a lot of different interpolators. In our case I used interpolatorRound, because it returns the nearest integer value and I do not want to see crazy floating values in our custom tween.
Available interpolators are:
d3.interpolatNumberd3.interpolatRoundd3.interpolatStringd3.interpolatRgbd3.interpolatHsld3.interpolatLabd3.interpolatHcld3.interpolatArrayd3.interpolatObjectd3.interpolatTransformd3.interpolatZoom
As you see there are quite a few and they will matched your needs in most of the cases. ;)
This works fine. The next step is to create a interpolator with the current text value as starting point and with our desired value as end point. This is easily achievable, because the factory is executed in the context of the depending element. That means, that we can easily get the current value by using this.textContent(see line 16).
But still the question remains, what is going on to animate this particalur text node.
To stick everything together d3 will execute the factory once and is expecting a function as return value. This function will be executed with a ton of values from zero to one (argument t in the example) later during the tween. These values represent the current progress of the transition. This returned function will additionally be executed in the context of the particalur element(in our case the text node) and exactly this becomes really handy. So we can also set the value easily via this.textContent(see line 25).
To make our circles a bit more fun let us add a transition to the mouseenter and mouseleave events. For that we could duplicate the code which kicks off the transition at the beginning and set a different value to d3.interpolateRound, but code duplication is never a good idea. So let us implement a nice little helper function.
1 2 3 4 5 6 7 8 9 10 11 12 13 14 15 16 17 18 19 20 21 22 23 24 25 26 27 28 29 30 31 32 33 34 35 36 37 38 39 40 41 42 | |
This way it is relatively clean and we have no code duplication in our code. You can check the working result below.
So far so good. Let us have a look at a bit more complicated looking tween. In both charts there are animated d3 areas, which I animated using tween, too.
Animating areas with attrTween
So let us check the code for that. It basically works the same. ;)
1 2 3 4 5 6 7 8 9 10 11 12 13 14 15 16 17 18 19 20 21 22 23 24 25 26 27 28 29 30 31 32 33 34 35 36 37 38 39 40 41 42 43 44 45 46 47 48 49 50 51 52 53 54 55 56 57 58 59 | |
Let us assume you already have set up an area and it is already shown in your SVG – I will not go into detail about this topic here, because it could fill its own blog post. This area is based on an Array representing the data. The solution for animating this I found so far is to duplicate the data via map and set all the values to zero(see line 21). It does not have to be zero though – these changed values will basically be the starting point of your animation.
In case of the example code you see startData, which represents the animation start and data which represents the animation end.
You have to define the transition and set a duration of 500ms. That is all to be ready to go and add our tween.
To animate everythings the d3 method attrTween is used. attrTween works mostly the same as tween with one difference. The wished animated attribute is modified directly when using attrTween.
attrTween expects the attribute, which should be animated, and a factory as arguments. This factory has to return a function that is able to deal with the current normalized time(values from 0.0 to 1.0).
So how does this work with two Arrays?
d3 has already an interpolator for that integrated – d3.interpolateArray.
1 2 3 4 5 6 7 8 | |
This returned function then has to return a value that represents the depending attribute(d in this case – see line 55). The returned value will be set to the attribute directly. This way there is no need to use this or to modify the element by yourself. You return the desired value and that is it. ;)
Sum up
Once you understood how the concept of tweening works, it not that hard. But the beginning is tough. I know that, in my case it took several runs to get it. ;)
Important things to remember are:
- use
tweenorattrTweento modify your elements - set up a
factorycorrectly and pass it to thetweenfunction - make sure the returned function works properly with passed in
current normalized timevalues
And that is it for today. Maybe this helps someone. This concept is really hard to describe, so I hope it is kind of understandable. You can play around with every example on CodePen and hopefully you will enjoy tweening as much as I do later on. Thanks for reading. :)